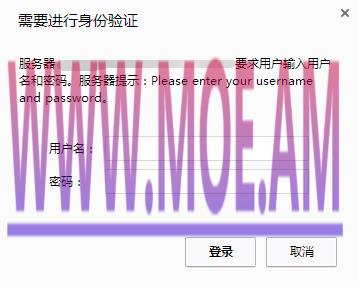
说明:ngx_http_auth_basic_module模块实现让访问者只有输入正确的用户密码才允许访问web内容。web上的一些内容不想被其他人知道,但是又想让部分人看到。nginx的http auth模块以及Apache http auth都是很好的解决方案。

这里以军哥的LNMP为例,默认情况下nginx已经安装了ngx_http_auth_basic_module模块。
Nginx认证配置实例
1、生成认证文件
# printf "test:$(openssl passwd -crypt 123456)\n" >>/home/htpasswd
# cat /home/htpasswd
test:xyJkVhXGAZ8tM注意:这里账号:test,密码:123456,记住认证文件路径
2、配置网站conf文件
server{
       listen 80;
       server_name  toot.su moerats.com;
       index index.html index.php;
       root /home/wwwroot/toot.su;
       location /
       {
                auth_basic "Please enter your username and password";
                auth_basic_user_file /home/htpasswd;
                autoindex on;
       }
}注意:一定要注意auth_basic_user_file路径,否则会不厌其烦的出现403。
3、重启Nginx
/etc/init.d/nginx restart
LNMP下为Nginx目录设置访问验证的用户名密码
有时候需要象Apache那样为指定的目录添加访问验证,一般在Apache下使用htpasswd来添加,而htpasswd是包含在apache2-utils里,一般LNMP一键安装包或自己编译安装LNMP都不会安装apache2-utils。
1、创建类htpasswd文件
执行下面命令:
wget -c https://toot.su/usr/down/htpasswd.sh;bash htpasswd.sh
按提示输入用户名、密码、及认证文件名。脚本会自动生成认证文件。记录下脚本返回的文件路径。如:/usr/local/nginx/conf/vpser.net.auth。
2、为Nginx添加auth认证配置
下面是以某域名下面的soft目录为例,在域名的server段里加上如下代码:
location ^~ /soft/
{
auth_basic "Authorized users only";
auth_basic_user_file 这里写前面脚本返回的文件路径;
}
Authorized users only为提示信息,可以修改成自己想让他提示的信息;auth_basic_user_file后面需要填htpasswd.sh脚本返回的人家文件的路径。按上面的提示修改好配置后,重启nginx,访问http://yourdomainname/soft/ 就会提示输入用户名和密码。
注意:加上认证之后该目录下的PHP将不会被解析,会出现下载提示,如果想可以解析PHP可以将上面的配置改为:
location ^~ /soft/ {
    location ~ .*\.(php|php5)?$ {
        fastcgi_pass unix:/tmp/php-cgi.sock;
        fastcgi_index index.php;
        include fastcgi.conf;
    }
    auth_basic "Authorized users only";
    auth_basic_user_file 这里写前面脚本返回的文件路径;
}
本教程适合LNMP一键安装包或自己安装的LNMP,只不过目录和配置文件可能位置不一样。
设置完执行:/usr/local/nginx/sbin/nginx -t测试配置是否有错误。
再执行:/usr/local/nginx/sbin/nginx -s reload载入配置文件。
